.png)
Learn more about the Forté offering in Architectural trims and how to include them in your flooring design.
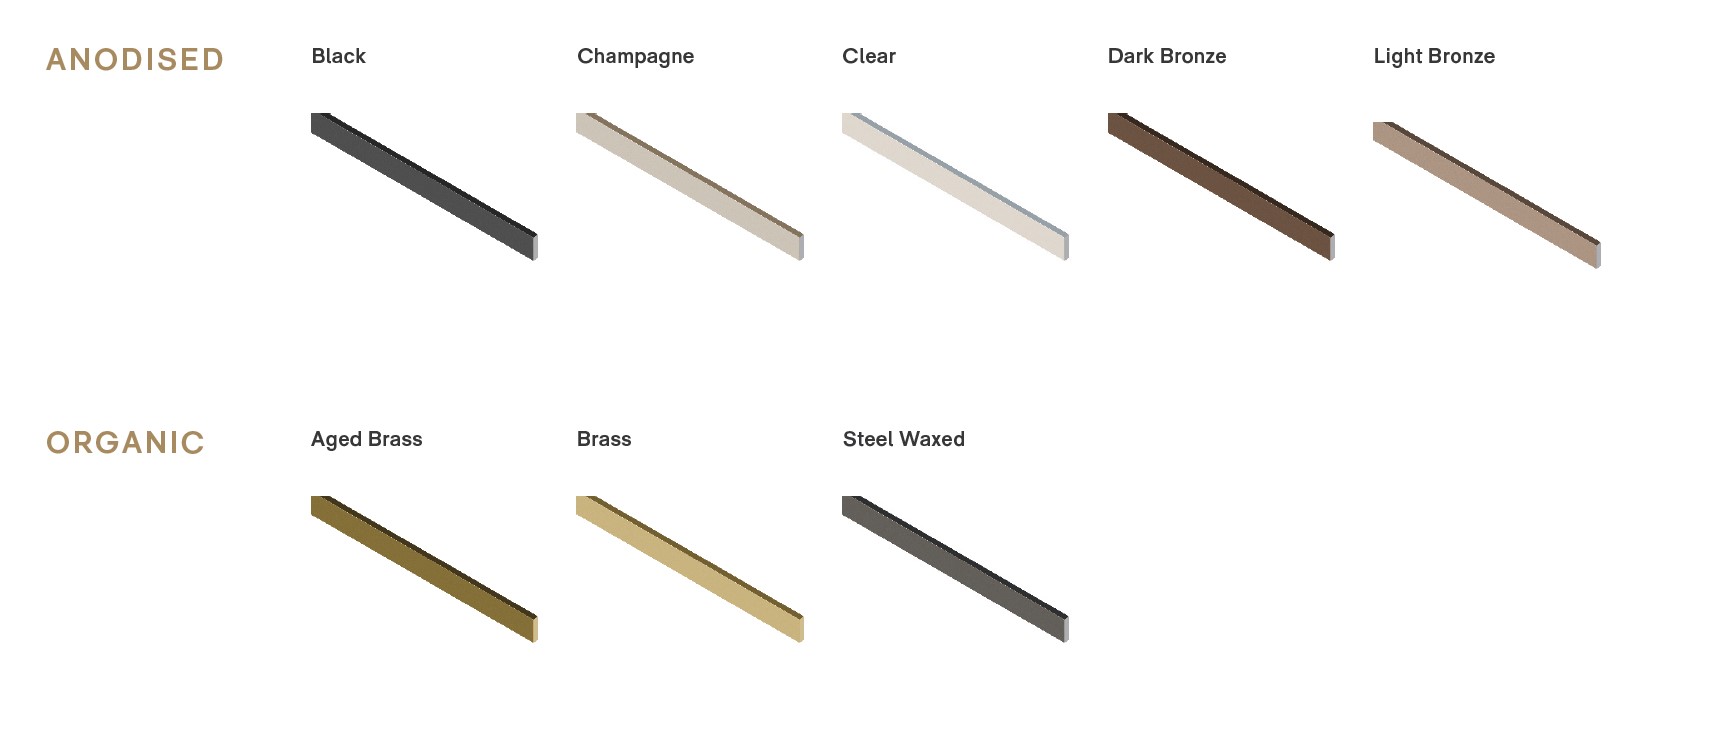
Forté offer a range of flat bars, including unfinished, organic and anodised aluminium flat bar options. Refer to our website for all trim options and availability.
Note: Ensure there are no variances in height between the two transition flooring surfaces. Refer to our Design Guide for advice on how to raise the level of a subfloor for a flush transition.
Contents
- Timber to carpet
- Timber to timber
- Timber to tile
- Timber to polished concrete / garage floor
- Ranch slider with angle trim
- Timber to front door
- Skirtings
Note: Generally the carpet should be set as litter higher above the timber to start with, as it will settle over time to be flush with the timber flooring.
If required, you can install an MDF ramp beneath the carpet to smooth any difference in heights.

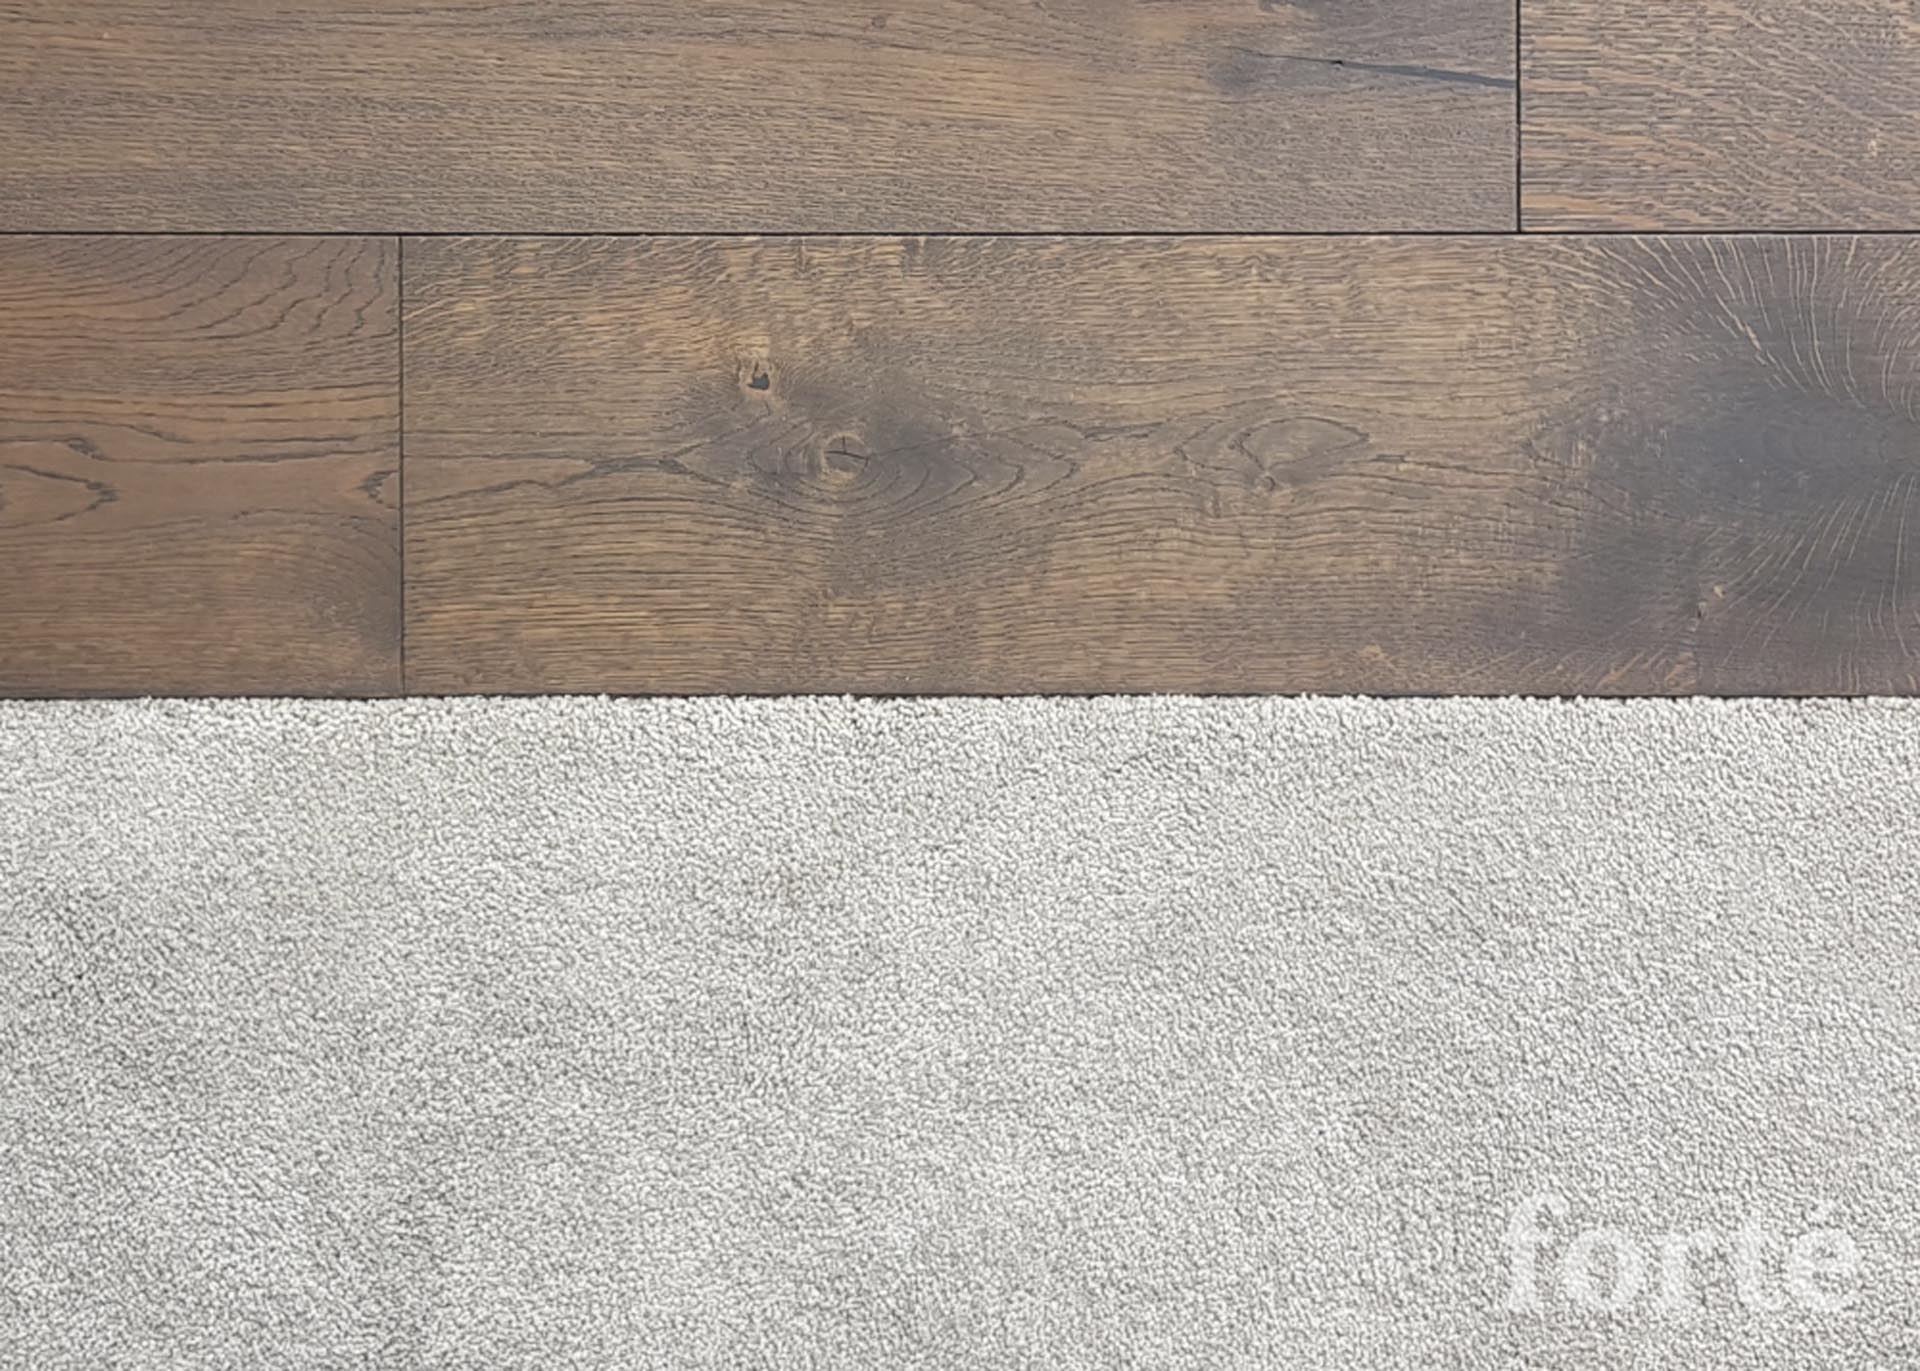
We recommend transitioning from carpet to timber using an extruded Flat Bar (Brass / Aluminium are often used) inserted into the flooring.
When the flat bar is installed along the edge of the timber it creates a protective edge for the wood which reduces the risk of damage and provides a quality finish.
Design requirements: The top of the flat bar should be set level with the top of flooring.


It is also possible to transition to carpet with no flat bar, however it becomes even more important to set the carpet height correctly as when the carpet settles, the edge of the timber has no protection, and may chip off if heavy objects are dragged across the transition.
Design requirements: The pile of the carpet should be set a little higher above the timber floor as the carpet pile will settle and potentially leave the timber edge exposed without protection.

Timber to timber transitions are commonly found with borders around the perimeter of rooms installed with herringbone and chevron flooring or when the room changes direction and a break in the floor is needed to allow the flooring to continue to run along the length of the room.
For transitions using an insert, we recommend using an extruded Flat Bar for the most quality finish and appearance.

Design requirements: The bar should be fixed to the transition edge with screws with the top of bar set level with the top of the flooring.


Design requirements: If you are not planning to use an extruded flat bar when adding a border or creating a break in your flooring, then where possible a T&G profile should be used to join the boards together. Sometimes this is not possible (where the profile has been removed).


While flat bars are often used for other applications, transitions between timber and tiles should use a tile bar which is attached directly to the tile (not the timber).
Note: The height of the transition should be considered prior to installation.

Design requirements: The tile bar is attached directly to the tile (not the wooden plank) and must be installed by the tiler prior to the wood floor being laid. When installing the timber, it should finish 2-3mm from the tile bar (to allow for expansion).
The silicone colour should match the colour of the flooring or the tile bar for ideal aesthetics. The tile bar colour should be selected to best match the space (black/silver/brass etc.)


The transition is finished with silicone only to look like grout. Design requirements: The tiles should be installed before the timber. As mentioned above, when installing the timber, it should finish 2-3mm from the tiles (to allow for expansion) and the gap should be finished with silicone.
The silicone colour should match the colour of the flooring or tile grout for ideal aesthetics. This is ideal for a curved transition or where a transition bar does not look good aesthetically.


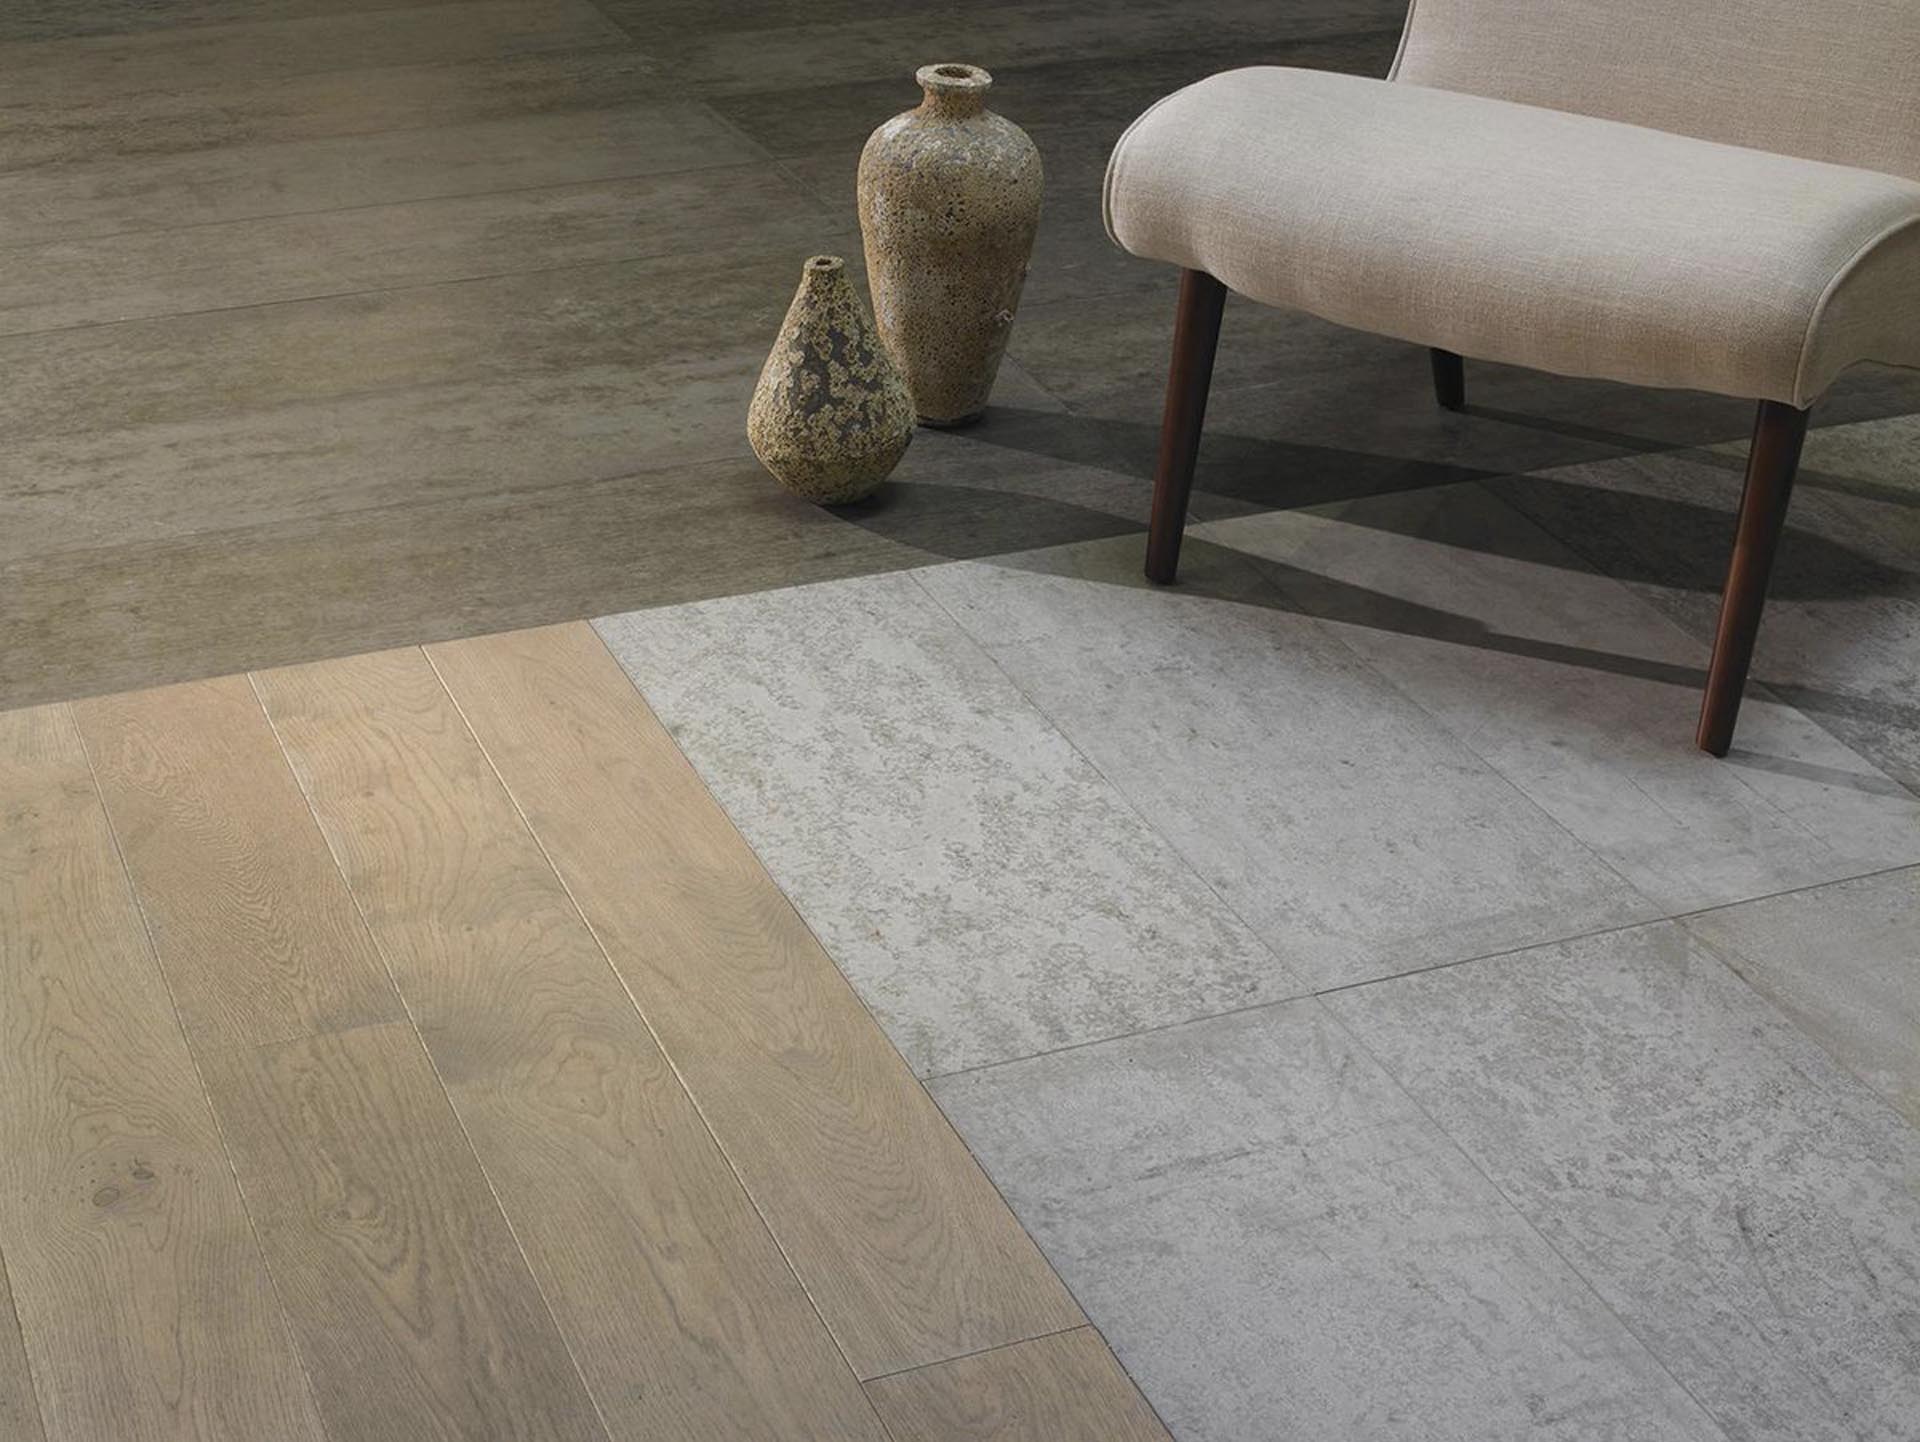
When transitioning from timber to a polished concrete floor (or garage carpet), it is important to remember that there may be a substantial height difference as the timber is glued to the concrete that it is transitioning to.
Design requirements: Experienced installers can make a ramp from the product being installed for a perfect colour match. Where possible, ramp down in an inconspicuous place like a doorway.


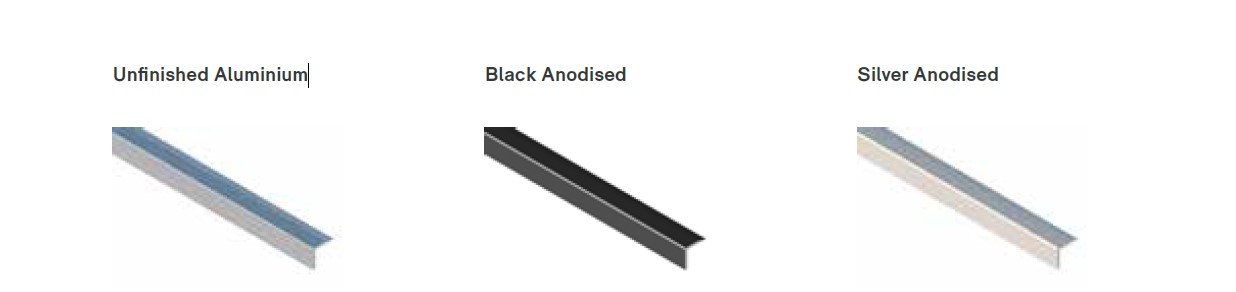
Forté offer unfinished aluminium angle trims as well as silver and black adonised options. Angle trims are usually supplied unfinished and then powder coated by the contractor to match the joinery colour.
Refer to our website for all angle trim options and availability.


If the flooring level is higher or lower than the ranch slider threshold, then a 13mm angle trim will be necessary to protect the flooring edges from wear and tear. The angle trim will need to be glued/taped to joinery.
Design requirements: Use a slim 13mm aluminium angle trim that is powder-coated to match the colour of the aluminium joinery.


Our recommendation would be to get the front door sill removed, or purchase one without a sill, before having the wood flooring installed as it gives a cleaner and more professional look overall.
Design requirements: The wood floor will need to be installed leaving a 2–3mm gap between the adjoining surfaces and finished off with a coloured caulking that matches your flooring.


Design requirements: Timber should finish 2-3mm from the sill and gap should be finished with silicone/ caulking gun. Silicone colour should match colour of flooring or sill for ideal aesthetics. Paint the Sill to match flooring or skirtings.


We recommend an 18mm skirting board to accommodate for expansion gap around perimeter.


Add a sophisticated finish to your project with our collection of architectural finishes and trims. Refer to our website for all trim options and availability or read more in our Design Guide.